Wednesday, February 19, 2020

Netguard 2 Firewall for Android - Unlocking the registration challenge response activation license code to authorize the Pro version

NetGuard - Firewall for Android (NetGuard2)
https://github.com/M66B/NetGuard/
https://github.com/M66B/NetGuard/releases/download/2.273/NetGuard-v2.273-release.apk

Successfully Unlocking the registration challenge & response code for NetGuard 2:
 (by genBTC) @ February 19, 2020.
Android <=7.0 CONFIRMED (NOT confirmed on 8.0 Oreo + above, but likely works)

Background
-------------------
NetGuard / NetGuard2 is a great firewall program for Android, and is unique in its functionality.
However, the pro features are all paid addons.
This program is fully open source though, and the .apk can be downloaded from F-Droid or straight from Github. This makes instant in-app payments impossible (as opposed to when from the Google Play Store). Also, there is NO remote server to "call home" to verify the authentication, because it has to work in this standalone mode too. This is even stated in the README by the author.
I have no issue with the developer receiving payment for his efforts, but,
One of the main PRO features is selective blocking/filtering, the main thing a firewall should be able to do, and is the main reason I downloaded and wanted to use this program.
The only other programs for Android I've found were "NoRoot Firewall" which I used previously and does do this, and "AFWall+" which uses linux IPtables internally and as a result won't work if the phone is not rooted.
Without the paid unlock, the program is only able to block whole applications (or system-wide).
For example, if we want to block say Reddit from accessing "facebook.com", that requires the paid version. Unacceptable.

So I begin the task of reverse engineering the authentication mechanism.
---------------------------------------------------------------------------------------------
It starts here: https://github.com/M66B/NetGuard/search?q=challenge
We search the code for "challenge" since that appears in the GUI.
Most of the results are *.xml files which contain strings and do not interest us.
The 2nd result is jackpot. app/src/main/java/eu/faircode/netguard/ActivityPro.java
We can see theres actual code calling something called menu_challenge()
https://github.com/M66B/NetGuard/blob/f408a3140925252742b5ed1e7e60711b87a16b4f/app/src/main/java/eu/faircode/netguard/ActivityPro.java#L273
As it turns out, menu_challenge() is in this same file, right below that. Line 288.
Jackpot! This is the entire challenge and response function!

Long Explanation
----------------------
Even without knowing Java, you can read this code. Here I will explain it in English:
A Layout is Inflated (stubbed out) and an Alert Dialog is created. (the GUI)
Now 3 Variables are created. android_id , challenge, seed.
Lets skip android_id for a minute.
Lets explain the code syntax. These are commonly called "Ternary" or conditional if statements. Basically an If/Then/Else command. Imagine the Equal sign being an "if", the ? turns into a "Then", and the : turns into an "Else"
Result = ConditionA ? AnswerA : AnswerB;
These say: If the Android we're on is < less than the version Code for the letter O, aka Android Oreo.
Android Oreo is 8.0 and SDK version 26)
Challenge = (If Android Version < Oreo ), just use the Build.SERIAL number. otherwise use "O3" + android_id. You can view this serial number in Settings.
Seed = (If Android Version < Oreo ), just use the word "NetGuard2" . otherwise use "NetGuard3"
This is both good news, we now know the scheme, but bad news if you are on Android Oreo 8.0 or above.
Continuing on, "display the Challenge in a TextView", and set up a Clipboard Listener to enable a Copy to Clipboard button"
The "//Response" area is next. All handled by the TextChangedListener.
The line of main interest is Line 319:             final String response = Util.md5(challenge, seed);
This is the verification function.
A MD5 Hash is generated from the "challenge" and "seed" variables from Android before.
Whatever we type as a response will be compared to this.
What you need to know. MD5 is only considered a hash function, an insecure one at that, and is 100% deterministic. This means that the output is exactly the same every time for a given input. Of note, an MD5 function typically only takes 1 input, but here we have two (the challenge and the seed). A seed is normally used as an additional source of randomness in other crypto algorithms. This term is incorrect here. Here it would be considered a Salt (cryptography) @ Wikipedia
Given that it is a fixed salt, and we can read the value from the source code, it would be trivial to perform an MD5 hash collision brute force attack on the hash, so this "seed" (salt) actually does nothing to protect anything. But a brute-force attack is not even needed.
Not only this, the actual secret input is not even a secret. We fully know the first half too ("challenge"), because the software outright displays it as the "challenge" field.
Also, at least up until Android 8.0, its also viewable from Android system settings.
(Android Settings > General > About this phone > Hardware Info > GOTA Serial number.)
So this function was/is extremely broken and did not serve any technical protection, it only serves as a lesson for what not to do. Which is why I'm making this public. The author must have eventually been told something similar and once he found out, implemented the "NetGuard3"/Oreo 8.0 version to prevent this, but still left the old one in for compatibility, and still implemented it wrong by displaying the "challenge" and having a fixed "salt".

continued confirmation:
We have almost all the information we need now.
We should investigate this Util.md5() function further, just to double-check what its doing with the 2nd parameter ("seed").
Searching for "Util.md5" doesn't lead you to it, because of how Java works, "Util." refers to the "Util.java" file in the same directory as the file we were just in, and inside is a function named simply "md5".
https://github.com/M66B/NetGuard/blob/f408a3140925252742b5ed1e7e60711b87a16b4f/app/src/main/java/eu/faircode/netguard/Util.java#L636
We can see it does:      MessageDigest.getInstance("MD5").digest((text + salt)
This says, "Create an Instance of the MD5 (message Digest function) and provide it 1 parameter (text + salt)."
In Java (and others), using + on two strings, combines the strings together (aka concatenates).
So "Text"+"Salt" == "TextSalt".
The rest of the code just takes the UTF-8 string encoding and outputs it as hex bytes ready to display, standard behavior, and thus is irrelevant to analyze.
So you can see in fact, MD5 DOES only take 1 parameter, and no other functions are being relied on for secret behavior.


Putting 2+2 Together (Android < 8.0):
-------------------------------------------------
We take "challenge", in this case, "LGLS992" (this is my phone's model number) and combine it with the ID "20d7f703" (Build.SERIAL)
This is available from Android Settings > General > About this phone > Hardware Info > GOTA Serial number.
We take the "seed", in this case, "NetGuard2". (always)
We combine them all together to form "LGLS99220d7f703NetGuard2" (USE YOUR OWN)
We run any MD5 function on it.
It outputs a sequence of 32 hex values. (A-F 0-9) like: 449d0a063a3cd230e1ffd57759b9852b
We type that number into the response code box.
It will auto-apply and once the last character is typed, it will auto-activate.
DONE! Activated! That simple! (and obviously just copying my key won't work).

We didn't even have to run any of his code, or use Java.
I ran my MD5 in Python, in about 5 seconds, like this.
Start up a Python prompt in a terminal, (python.exe or python) - interactive interpreter mode.

resp = "LGLS99220d7f703NetGuard2"
import hashlib
hashlib.md5(resp).hexdigest()

OR - You can also use an online MD5 hashing service, such as: www.md5hashgenerator.com , onlinemd5.com etc.
Any data you submit there is not private, but it also is not dangerous in this case.
(and obviously just copying my key won't work).

Android 8.0 > above (unconfirmed Method)
---------------------
In the exact same way, we can copy and paste the visible "challenge" plaintext + "NetGuard3" salt combined together, and MD5 hash that to form the key.

Some thoughts:
FUTURE THOUGHTS AND NOTES:
"Challenge" is a result of "O3" + a query to Settings.Secure.ANDROID_ID variable instead.
I'm not an Android dev, so how to query Settings.Secure is new to me, and I'm not sure if this is even accessible outside. We may need code running on the device to query that. Using this makes it way more secure, but the current implementation is still broken regardless. And nothing is impossible.
"On Android 8.0 (API level 26) and higher versions of the platform, a 64-bit number (expressed as a hexadecimal string), unique to each combination of app-signing key, user, and device." from https://developer.android.com/reference/android/provider/Settings.Secure
This seems to indicate that this value is indeed secret and unique to code running specifically in the Netguard application context (based on the authors app-signing source code verification key)... So if we want to crack it, we must use another method, such as recompiling it ourselves. I will revisit this approach at another time, if this MD5 trick gets patched out. I wanted to get this uploaded first.
UNRELATED RAMBLINGS:
This reminds me of a related story recently about Android app-signing keys still using MD5 are becoming deprecated and banned from the Play Store. Keep in mind, that doesnt refer to the MD5 unlock license key we just bypassed, it refers to the entire application .apk. However from the Settings.Secure.ANDROID_ID description, in this program the license key code seems to rely on this app-signing key code. IMO if we can crack the app-signing itself, we can crack the license key too. So I checked this .apk status, its currently signed by "faircode.eu" using a SHA256+RSA2048 algo. Darn, now thats out of the question. Cracking that is above my paygrade, literally, 2048 bit RSA keys - 140.8 CPU years, (the cost of $20,000 - $40,000) as I last checked. Not impossible, but not a trivial thing. BTW, we all should be using 4096 bit RSA keys as of now. I would consider 4096 way more safe from brute force attack, even for a rich person. At least until Quauntum Computers :)

Friday, July 26, 2019

new video by Wendell from Level1Techs on Talos II OpenPower Secure Workstation + my original comment

Wendell's video is located here: https://www.youtube.com/watch?v=5syd5HmDdGU

Forget x86; OpenPower is it! Talos II Secure Workstation!

My comment on it:
Wendell i've found some alarming stuff in my ASUS decompiled BIOS, namely while searching for strings, I found "BACKDOO" and started digging around that area, and found what essentially amounts to a literal BACKDOOR highway linked to the Windows Drivers, namely started with me investigating my ASiO.sys (which I thought was for my sound card) but its actually for Asus IO (or AsusGIO) aka AISuite aka the new Aura Sync - also linked to ATKEX.dll and PEBIOSINTERFACE32.dll - and tied to windows service atkexComSvc - for control of hardware bus devices like fan control, lighting, USB charging, that kind of thing. It seems to have a deep link straight back to the BIOS and the driver can be exploited and the BIOS seems weak. There were even CVE's posted, CVE-2018-18535 , CVE-2018-18536 and CVE-2018-18537. Now, I havent experienced anything myself but theres been reports of questionable behavior (memory leaks, unwanted internet traffic, etc) indicative of active exploits in the wild surrounding this also. Its very alarming, and I wish I had the ability to do a more complete security dissection and writeup of the decompiled BIOS but honestly I can't read IDA to save my life :) So I am passing this info onwards to you. Please forward this to anyone applicable or if thats you and you see it, please look into this info.
Sources:
1: https://packetstormsecurity.com/files/150893/ASUS-Driver-Privilege-Escalation.html
2: https://packetstormsecurity.com/files/cve/CVE-2018-18535
3: https://packetstormsecurity.com/files/cve/CVE-2018-18536
4: https://packetstormsecurity.com/files/cve/CVE-2018-18537
5: https://community.norton.com/en/forums/pebiosinterface32dll-0
6: https://rog.asus.com/forum/archive/index.php/t-11511.html

On an unrelated note, I also just discovered (maybe its known to everyone) that VMWare put a literal backdoor in for their VMWare Tools for the guest to communicate back out to the host over a high bandwidth IO channel using specific CPU registers and memory addresses. At least they were kind enough to name it "open-vm-tools/lib/backdoor/backdoor.c" and open Source it - Also worth looking into.
This is on top of the well known information you mentioned about the vulnerable Intel ME engine and danger of closed source BIOS/UEFI - so I am eagerly following th open source firmware community, like Tianocore, CoreBoot and Libreboot for Thinkpads and the like... But yes I am sortaa? getting into these deep endeavors but its extremely above my head, and I assume for most people its so deep its just off the radar. Thank you for bringing this amazing Talos/Power9 machine to light!

I wish I could respond further and in more detail but I wanted to get this posted as is first, with some links. Disclaimer: I'm not an actual security researcher, I'm just a life long nerd trying to be one.

Monday, July 22, 2019

Emmett Brown - VOID (Synthwave album on Bandcamp)


Check out Emmett Brown's music, its Synthwave, and easily some of the best stuff I've heard.
One of my favorite songs is Twin Pines Mall. and Hypercolor Tease.
Free to stream!
Right up there with Perturbator, Carpenter Brut, Kavinsky and the like.
Be sure to check out his first album MANIC too.
He's also on Spotify 

Sunday, April 29, 2018

UEFI Booting NVME on x58 Project w/ Tianocore by mrlithium (draft) 4-29-2018 - Round Two

Using a TianoCore DUET USB stick to Boot Windows 10 in EFI mode from NVME SSDs such as Samsung PM961 on Legacy Platform X58 Chipset.

Already confirmed working on Asus Sabertooth X58 motherboard and Intel 750 Series SSDs approx 2 years ago.
Since then, a nice person named AudioCricket has developed a cleaner tutorial, (see AudioCricket blog article on Booting NVME ) which made me want to revise my own process, as he credits me with thanks for knowing it was even possible. You should read his also, its got some good details.

This tutorial is meant to give you bootability on extremely high speed NVME drives. If you are not using a high speed drive, or its in a wrong slot, you may not see much benefit. The whole boot process workaround itself, from the Tianocore DUET USB, takes up a valuable 10-15 seconds at bootup. You will pay a longer price on boot, but your Windows OS will be booted onto this faster drive, and there is no substitute for that. You already could use these drives as secondary storage partitions with no configuration, but thats just boring.
Linux Note: that if you are using Linux, all my info is largely irrelevant. Linux takes entirely another approach to booting.

My Process involves using the TianoCore DUET software and UEFI bootloader to chain boot load EFI Windows from a MBR USB stick.

To redirect your BIOS Boot -> MBR of USB stick -> virtual/emulated UEFI environment (Tianocore DUET) -> load open source NVME driver -> NVME GPT / EFI Windows System boot.
1 USB Stick for TianoCore UDK_X64  (USB 3.0 maybe needs an XHCI driver)
1 USB Stick for Windows 10 Setup ISO
Executing a few commands at the shell prompt
Running the Windows Setup Installer off a 2nd USB stick, using that to lay down new partition information and blank your NVME SSD.
Installing a new copy of Windows to the NVME SSD, with its own EFI partition and GPT layout. This is the best way to get the EFI boot working.
Booting NVME cannot be done without UEFI and booting EFI must be done for Windows (winload.efi). You cannot have Windows boot MBR (winload.exe)
At this point you will have two Windows Installs, and able to dual boot to the new NVME OS drive by inserting the Tianocore USB stick and booting

Boot process summarized: (Thanks to AudioCricket for his excellent description)

  1. Computer powers on
  2. Legacy BIOS boots / initializes
  3. Tianocore DUET boots from the USB stick
  4. Tianocore DUET executes UEFI Shell
  5. UEFI Shell loads generic NvmExpressDxe-64.efi driver and remaps system block devices
  6. UEFI Shell now sees Windows 10 hidden FAT partition DIRECTLY on the NVMe
  7. UEFI Shell executes Windows 10 UEFI bootloader from that hidden NVMe FAT partion directly (\EFI\Boot\Bootx64.efi image)
  8. Windows 10 is now booting and is in full control of your computer (under UEFI mode, of course)

Tianocore USB Stick Creation:


The USB stick needs to be formatted with "HP USB Disk Storage Format Tool" as opposed to Windows, so just download that. There is a reason for needing that stupid program, The MBR and DBR / BPB boot sectors need to be written as if it was a HDD not a removable (floppy) - err don't ask - :) After you reformat it, unplug/replug it.

Start up an administrative command prompt, and cd \tianocore_uefi_duet_installer-master
or, go into the location of CreateUSB.cmd  
Replace J: with the appropriate letter for your USB stick. (double check with HP USB Tool).
.
CreateUSB.cmd J:

Make sure no errors / unsavory messages are shown,
then unplug/replug it, and run this:

CreateUSB.cmd J: UDK_X64

This copies MOST of the files. You still need to manually copy over the file Drivers\NvmExpressDxe-64.efi this can be obtained here: or you can compile your own (coming soon/later)

UEFI Interactive Shell Usage:

From now on, rebooting from the Tianocore USB will launch into a shell. It acts kind of like DOS or Linux does, a simple command shell. Here you can explore and decide what commands to run:
Hit enter after every command. Theres also tab completion. You can use dir to look around.
Green colored files are executable and just typing their name should run them, for example *.efi
FS1: for drives (like C:) and \ for directories.
FS0: should be your booted Tianocore USB drive
FS1: should be the Windows USB stick
FS2: should be the NVME SSD drive (not visible yet)
Run these two important commands:
load \EFI\Drivers\NvmExpressDxe-64.efi  (loads the .efi program for detecting NVME devices - from this root pathname on the current prompts' FS device name)
map -r  (this will make new FS2: alias, etc)
Theres also "BLK" devices that correspond; you can ignore these besides to make sure they do exist for the right USB SATA or PCIe location.

A "startup.nsh" script can also be created, to AutoRun on boot, to automate the above commands in their final form or for anything else special that you may need or want.
Startup.nsh lives at \EFI\Boot\ directory and should just be auto-executed from there.

To boot the Windows Installer on the 2nd USB stick:

FS1:\bootmgr.efi
or
FS1:\efi\boot\bootx64.efi

Follow the Windows Setup, "Install Now" and choose "Custom Upgrade" so you can pick the right drives UnPartitioned Space (If you already attempted this, its best to Delete partition and go back to UnPartitioned Space and then say yes to "Windows may create some additional system Partitions". If it complains they are not in the correct order, "Delete" and hit OK on "UnPartitioned Space" again. The installer's Partitioner should be able to see your NVME drive immediately and without any drivers needing to be loaded.  Installation is seamless from here on out, other than a few reboots. Once the Windows Installer accepts your partition layout, it lays down the EFI partition on your NVME drive,  and starts "Copying Files...".  Meaning, across reboots, you need to reboot it from the NVME drive, not the Windows Install USB stick. While you're still technically doing the Windows Install, everytime the system reboots, this is the command you want to enter at the shell prompt to continue the installation. 

To boot Windows on the NVME drive:

FS2:\EFI\Microsoft\Boot\bootmgfw.efi

FS2 should be the alias for your NVME PCIe SSD drive device, (if not- double check, find it out).
This Runs the Microsoft EFI boot manager - that supports NVME boot.
Then Microsoft takes over, and the rest is magic. Now your system is fully working.
You would want to put this command in "startup.nsh" so its automatic. Keep in mind the FS drive letters numbers may get shifted, even due to just USB sticks.

Possible Secondary Optional or Advanced Steps:

Update Driver ? - replace the Microsoft stornvme.inf driver with a Samsung NVME driver (or whichever one, Intel?).
Using USB 3.0 to boot may require: \EFI\Drivers\XhciDxe-64.efi
Eliminating the need for a permanent USB Stick by copying the partition to any other internal hard drive in your system, and making room for it and also being able to dual boot it.
Not actually installing windows, just laying the boot partition down and then re-copying an Image of windows back over to the new SSD.
Small = ~4 Few megabytes. = Can be downloaded as a Disk Image *.dd, and use RUFUS to restore it back. Should be able to replicate Tianocore USB sticks for backups/disasters.
Editing the Windows BCD to get Dual Boot or Multiple Partitions combined or something else.
Remove un-wanted drive letters of the other system after bootup.

Super Fast NVME PCIe SSD's on Legacy X58 Platform - other Practical Considerations:

*** PCI-e version revision and link width ***
PCI-e 2.0 was the max for X58, and as of today we are up to PCI-e 3.0 which doubles bandwidth by 2x.
Theres also certain slots that are PCI-e 1.0 slots (the bottom slot on Asus Sabertooth is 1.0 and the 2nd GPU x16 slot is the only next best highest speed 2.0 x4 slot :/
Benchmark overall speed drastically improved when switching slots, from around 750-770MB/s over PCI-express 1.0 x4 to 1450-1600MB/s on PCI-express 2.0 x4. (With the Samsung PM961 SSD, and tested under CrystalDiskMark and AS-SSD.)
Note this is nowhere near the drives theoretical maximum, that would requires PCI-e 3.0 and should be hitting somewhere over 2-3000 MB/s.
Also note that most slots are only physically, but not electrically, the full width of PCI-e lanes. Make sure your slot is valid.
It is advised to check in a program like HWInfo64 or AIDA64 at your Motherboard slot DMI information and for sure confirm the devices are detecting at proper revision and width. (CrystalDiskMark will say the link speed for PCI-e devices now so thats handy). If not, Power Management settings could be configured to do Link State Power Management or whatever thats called.

Friday, April 20, 2018

UltraDefrag Mod 7.0.4 alpha genBTC edition

UltraDefrag 7.04 (UDefrag) - mod by genBTC
Compiled from C++ source, and edited.  Requires WxWidgets.
Integrated StopGap software - requires Boost libs
New Build system devised for use in Visual Studio . Supports 2017 and CMAKE on Windows.
Supports Building with MSVC or MINGW G++.


Now includes Files List tab.
Also Supports finding files by LCN cluster, finding LCN cluster by filename, right click on file list.

- Development has been put on hold, and there is a great deal of work involved in this project.

Thursday, April 19, 2018

Windows 10 SysAdmin : Maintenance Ideas and Tasks for Power Users - edit 1

As I write this, I'm thinking of the multiple ways Windows needs to be managed after its installed.

Lots of people only know 3 steps. #1.Install, #2.Run WindowsUpdates, and #3.Re-Format when its broken. Thats not my style.

Before we even install we have choices to make: Enterprise LTSB Version of Windows.
The current version is Enterprise LTSB 2016 and this removes all the extraneous Modern Apps and allows the blocking of telemetry easier, and applies some group policy updates.
Regular Windows 10 Pro 1709 has more features tightly integrated that are harder to rip out after installing.

The Windows 10 OS has many subsystems which need to be understood as seperate parts that are all interconnected. Understanding what to do with them and why is the mission of this blogpost.

Task Manager: 
Processes (PID, CPU Time, RAM usage) / Performance Counters, Services
This should be the first place you should start looking.

Filesystem Permissions / ACLs' / Security Descriptors / SIDs
the built-in named Administrator account should be disabled, and a new Administrative one with a new name should be Created, and a strong password that you can remember be given to it. This password should not be something re-used as the local Windows SAM Security database is highly insecure and these credentials can be easily read or reset by anyone with physical access.
Your Daily Driver user account should be a standard user, and only use the new Admin account and password when you need to UAC escalate priveleges. This follows the concept of Principle of Least Priveleges.

Group Policy / User Accounts / User Groups / Active Directory (Domain)
Now that you're a standard user and you can hardly do anything, you may feel tempted to just re-add yourself to the Administrator group or PowerUser group or BackupOperator group. These groups accounts come provided with certain pre-defined rights pre-assigned. Its very hard to tell what does what, and there is some advanced configuration located in GPedit.msc \ \ Computer Configuration \ Windows Settings \ Security Settings \ Local Policies \ User Rights Assignment & Security Options.
This brings us to group policy: Theres a ton of stuff in here that you are free to look through and customize.
The major trick to run is "Windows Restricted Functionality Limited Baseline" profile available from external download from Microsoft.  That will run a few scripts and lock the system down, even 1 step too far in fact. It will over-ambitiously enable "Disable Automatic Root Certificate Updates".  Reason we need to change this is, you need your OS Certificates stored certs to update or you will be unable to browse most websites (even in Chrome). Go into gpedit.msc and d this and reverse that entry (to "Not configured"). It is under computer configuration, Double-click Administrative Templates, double-click System, double-click Internet Communication Management, and then click Internet Communication settings. Any hyper paranoid person can individually manage their certificate store and this is another topic.


Windows Registry - regedit - hives
HKEY_CURRENT_USER = %USERPROFILE%\NTuser.dat (@ C:\Users\Username)
HKEY_LOCAL_MACHINE  = %WINDIR%\config\SYSTEM (@ C:\Windows\system32)

Task Scheduler Service - Automatic (important)
Task Scheduler Engine: C:\Windows\System32\Tasks
Files exist in this directory and can be managed with: taskschd.msc
Security Permissions are required for any Tasks running as NETWORK SERVICE, etc.
Individual Tasks:
My specific Win10.10240 Install has 143 Tasks , about half of which I was able to disable manually.
They have "Description" fields written by Microsoft with actually valid information to decipher what these mystery tasks actually do. Note Some are blank, and Note some tasks being disabled cause Event Log Errors. This leads me to the next point.

The Event Viewer: eventvwr.msc
Application, Security, Setup, System = Default Logfiles
These are useful to skim through on their own. You can diagnose most of your errors this way.
But, Microsoft has also hidden thousands of other logfiles under the \Microsoft directory (a lot of which are useless, blank, disabled) and you can dig down to obtain further info on anything in specific, an example as such is "DeviceSetupManager" - to look at the list of every device that was plugged into your computer.
You can then Filter the list by "Event ID" and there is even a whole .XML for customizing the filters, saving them as a Custom Log, and referring back to that in the future.


"Programs & Features" > "Turn Windows features on or off" (list of toggleboxes)
Disabling Internet Explorer 11 will prevent it from being run, however it can never be truly gone, as its provided in DLL form as shdocvw.dll and mshtml.dll. These cannot be force-deleted as the number of programs that used the Windows Shell API (SHLWAPI.dll which indirectly references those IE dlls) to make outgoing internet connections will fail. This is something other people have noticed as having security impacts: https://packetstormsecurity.com/files/136702/Microsoft-Internet-Explorer-11-DLL-Hijacking.html
100% disable the "SMB 1.0/CIFS File Sharing Support" this is a vulnerable component in SMB filesharing (Samba support) for backwards compatible to legacy windows or legacy linux systems. Read: Old. Nothing will be impacted and this was in fact even recommended by Microsoft recently.
You will want to look through the list and Disable Everything EXCEPT the .NET environment, Windows Powershell 2.0 and Windows Process Activation Service.

"Uninstall or change a program"
This list of programs comes directly from the registry. Environment variables are set mapped to the proper directory there also.
Windows Installer Service
C:\Windows\Installer\
C:\ProgramData\ (%ProgramData%)
C:\Program Files\Common Files (%CommonProgramFiles%)
C:\Program Files and C:\Program Files (x86)  = Administrator (%ProgramFiles% and %ProgramFiles(x86)%)e
C:\Users\Username\AppData\Local  = User Local (%LOCALAPPDATA%)
C:\Users\Username\AppData\Roaming = User Roaming (%APPDATA%)

Windows Updates:
Windows Update Service , Background Intelligent Transfer Service , Device Setup Manager (drivers)
C:\Windows\SoftwareDistribution\ (safe to delete and auto-rebuild, instructions online)
This should be disabled with the settings in the program "O&O Shutup 10" available free.
To install updates, you need to do it manually.
Step 1 - visit the list of updates and find the right version: https://support.microsoft.com/en-us/help/4093112
Step 2 - at the bottom of that, click "Microsoft Update Catalog" and follow the download links.
Windows Update Service needs to be re-enabled for the Cumulative Update .msi Packs to install, or it will say some Error like "Could not run this update" If you see "This was not compatible with your machine, you picked the wrong one"

Modern  / Metro / Tile Apps:
C:\Program Files\WindowsApps
C:\ProgramData\Microsoft\Windows\AppRepository
Tile Data Model Server - updates modern start menu's tiles.

TaskBar
Shell Infrastructure Host ( sihost.exe ) - The black GUI overlay of systray and Modern GUI desktop/taskbar app-windows. Disabling this will cause some problems like not being able to start Calculator or Display Settings (desktop ms-settings:display has no assosciated program)
SIH client (server-initiated healing) sihclient.exe - detect and fix system components that are vital to automatic updating of Windows and Microsoft software (Constantly Goes Online) - disable in TaskScheduler
Cortana:
This can be slightly disabled with O&O Shutup 10 and thats all you can do. Other ways to force rip Cortana out can result in OS breaking.
Remove-AppxPackage -name *Cortana* (dont do this unless you follow another guide)

Startup:
HKEY_CURRENT_USER\SOFTWARE\Microsoft\Windows\CurrentVersion\Run
HKEY_LOCAL_MACHINE\SOFTWARE\Microsoft\Windows\CurrentVersion\Run
Win10 Task Manager Startup tab does not show those entries, they are different.

PowerShell:
Remote-Signed Security Policy - necessary to run scripts from the internet, BUT can/should be toggled by admin On/Off as needed instead of leaving it as default on.
All the Internal Components in Windows can be managed by the appropriate PowerShell Cmdlets.
There is Tab Completion, and a Get-Help command which downloads useful help from the web.

Windows Firewall:
Windows Firewall with Advanced Security = On by Default, Leave on, VERY IMPORTANT.
You should be micro-managing this. This is your lifeline to prevent intrusion and exfiltration.
This deserves its own whole topic but I will try to keep it short. The default config comes with hardly anything blocked. The Restricted Traffic Baseline does a better job at it, however most Outbound conections are still Unblocked. Don't trust your Win10 OS. It makes random connections out, and you want to set a default rule of Block ALL Outgoing, Block ALL Incoming. And then set up whitelists for every program you use. Most people hate using Windows Firewall because of the poor GUI, and the tedium of adding a rule for every single program. But new programs have come out called "Windows Firewall Control" and "Windows Firewall Notifier" that pop up Notifications everytime an unknown Outgoing connection is made and you will be prompted (normal windows firewall only prompts you for Incoming). For reference, I have 842 rules and I try to keep them logically organized and up to date. These programs are very powerful and inventing your own system and Getting used to this fully will take several months.

Windows Defender:
Unless you are Admin'ing someone elses computer, I personally see no use for this; definition based scanning has a poor success rate and consistently takes a ton of resources and it bogs down hard drive accesses because its literally scanning every single file you access while Real Time Protection is running. MSMPENG.exe is the process name, and related ones, and you can check to see the resource usage in Task Manager... I just force disable it with "O&O Shutup 10" and disabling the tasks in Task Scheduler  - \Microsoft\Windows Defender
Following the rest of my tips will keep you informed of when your system is going wrong, you should be able to prevent yourself from getting virused and malwared, and you dont need this waste of space built-in program and its weak detection heuristics and false positives.

Drivers:
Device Manager : View | Show Hidden Devices
Make sure nothing weird is latent.
You can delete any grayed out devices that you know you don't need.
Device Drivers and System Drivers and System Services
Serviwin.exe from NirSoft: Gives you access to the list of System Drivers and Services.

System Drivers:

Services:


Data Backup
Strategy : 
1. Onsite Backups: When a server crashes or fails, it is helpful to have data backups on hand for easy restoration. It’s a cliché, but time is indeed money. Onsite backups are often faster to restore than cloud backups and almost always faster than offsite tape backups.

2. Offsite Backups: Onsite backups are valuable, but they cannot be counted on alone. Should something disastrous happen to the data center, it could also damage any backups you have in the building. For that reason, it is always wise to have copies of your backups offsite where they can be accessed manually or through the cloud.

3. Optimized Backup Schedule: Backups are not a one and done process. Key data in your data center must be regularly and consistently backed up according to a clear and organized schedule. Check out our blog article on just a few backup rotation schemes for more information.

4. Backup Testing: Backups need to be tested and need to be tested regularly. In addition, the IT staff must be trained on how to access and restore their data backups as quickly as possible. A backup that fails or a team that is unable to restore the backup quickly undermines the company’s investment in a backup solution in the first place.

5. Organized Storage System: Mostly applying to tape-based backup solutions, the storage repository for backups and labeling system must be clear and organized. The team cannot commit extra time digging through box after box of tape looking for a specific backup from a specific date several years ago

Practicality (my strategy):
Nightly backup of the entire C drive and boot partition, with Macrium Reflect. To a compressed non-linear Macrium image *.mrimg , for dynamic incremental restore using Volume Shadow Copy . 
However using Macrium seems to cause errors restoring Chrome, it detects a change in the filesystem and corrupts the userprofile unless you use the Account Sync to Cloud UserProfile feature. Restoring sector-by-sector instead is extremely slow, but also more accurate. 
Sector Backups (like with linux dd) also have the benefit of being more robust for data-recovery in disaster situations where part of the image may be unreadable, you may still be able to read parts of the direct disk image. A NTFS FileSystem can even be mounted and manually restored from a linux recovery console.
Windows Account User Profile is backed up to FreeNAS ZFS + DeDupe and Snapshotted nightly.
Some Documents and Pictures are backed up too, but not much.
All the rest of my stuff is stored on FreeNas on a ZFS RAIDZ-1 or ZFS Mirrored SMB share
Data needs to be categorized into: 3 Copies, 2 Copies, 1 Copy. Anything with 1 copy is accepting the risk of total loss. The 3rd copy is for the most important stuff and should be in a totally different format, and physical location.
Programs:
Macrium Reflect Pro
Easeus Todo Backup Home
Acronis Backup 11.7 Workstation 
Windows Block Level Backup Engine Service
System Recovery Partition , WinRe.wim
NextCloud / OwnCloud
Backblaze / Carbonite / Crashplan / Mozy / etc

Tuesday, January 30, 2018

My Other Redirected Websites

My Other Redirected Websites
http://autotrimps.site
http://mrlithium.site
My Actual Other Website
https://genbtc.github.io (Github Pages)
https://mrlithium.blogspot.com (this page - Blogger)

I am currently setting up a bunch of servers for all those things, in the meantime they all just link to my resume. More to come.

Monday, January 22, 2018

Coursera Courses - Learning

Data Science
10 courses | Johns Hopkins University
Build foundational data science skills in this hands-on introduction to R, machine learning, and more.

Business Analytics
5 courses | The Wharton School of the University of Pennsylvania
Make data-driven marketing, HR, finance, and operations decisions.

Machine Learning
4 courses | University of Washington
Fit models, analyze data, and build an end-to-end practical machine learning applications.

Statistics with R
5 courses | Duke University
Perform frequentist and Bayesian statistical inference and modeling in R.

Business Foundations
6 courses | The Wharton School of the University of Pennsylvania
Develop basic literacy and skills in marketing, finance, accounting, and operations.

Introduction to Project Management - Principles and Practices
4 courses | UC Irvine
Coordinate and scope complex projects; fufill PMI education requirements.

Digital Marketing
6 courses | University of Illinois at Urbana-Champaign
Strategic planning and analytics for digital marketing channels.

Leading People and Teams
5 courses | University of Michigan
Inspire, motivate, and influence individuals and groups.

Python - Popular in Computer Science
5 courses | University of Michigan
Get a beginner-friendly introduction to programming and processing data in Python.

Java Programming and Software Engineering Fundamentals
5 courses | Duke University
Learn how to build scalable products in this introduction to software development.

Data Engineering on Google Cloud Platform
5 courses | Google
Gain practical, hands-on machine learning and big data experience.

Full Stack Web and Multiplatform Mobile App Development
5 courses | Hong Kong University of Science and Technology
Master frameworks like Bootstrap and Angular to be a versatile web developer.

Thursday, January 18, 2018

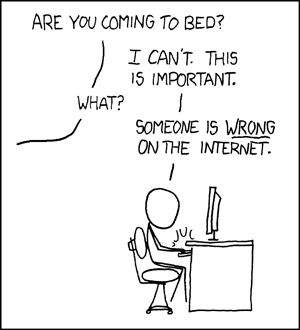
XKCD #386 - Somebody is wrong on the internet.

Permanent link to this comic: https://xkcd.com/386/

My Mood Right now


https://genbtc.github.io/

I've set up a private website @ https://genbtc.github.io/
- Right now its hosted on Github Pages using their free domain, but:
- Host it on DigitalOcean for $5/mo - My Referral Link
- or Host it on Vultr for as low as $2.50/mo - My Referral Link
- NameCheap has actually $1 a year domains

My Guide to DigitalOcean Products:

These are the servers I recommend in green, and if you are wondering you can skip the ones in red.

preferred digitalocean droplets

- Get the products above on DigitalOcean for $5/mo - My Referral Link

also

Vultr  Has a special going on right now for Bare Metal Instances that are pretty heavy duty for darn good prices:

Thats 32GB of ram, 50TB data, an 8 core CPU, 2x 240GB SSD and I can assure you they are fast.


Or this is what the regular products are:


And luckily they are in a buncha areas too:


- or Host it on Vultr for as low as $2.50/mo - My Referral Link

Wednesday, January 17, 2018

New Posts

I'm going to start posting more, And I need to remember How much fun I have when I write these blog posts.
-Thanks to anyone who reads them!

Monday, November 13, 2017

Compiling a Node.JS app into a .EXE using PKG step by step walkthrough and hints about zeit pkg and completing dynamic requires using package.JSON

I have a Node.JS app thats very bloated on disk (lot of node.js dependencies) and a huge file tree.
In this guide, we will turn that from:


Using:

https://github.com/zeit/pkg - Node.JS Binary Compiler

"This command line interface enables you to package your Node.js project into an executable that can be run even on devices without Node.js installed."

Start up a command prompt with Node installed and run:
npm install -g pkg
The actual command to compile is one such as:
pkg discordbot --targets latest-win-x64 --debug

Usage:
pkg = this command (npm node command)
entrypoint = the folder of the node.js app, or . for current dir - must find package.json
--targets = nodeRange-platform-arch
    nodeRange node${n} or latest
    -platform freebsd, linux, macos, win
    -arch x64, x86, armv6, armv7
--debug = There is very little output, compilation succeeds but may have omitted resources.

Now is the fun part, you get to find out which errors you had and how to fix them:
The first problem is:
package.json

A) You need to know the basics of JSON.
B) You need additional information in there to make sure it works.
C) Files are going to have to be declared manually, as the tool is not dynamic require aware. This means such things like:
const requireStructure = name => require(`../../structures/${name}`);
or:
function createNpmDependenciesArray (packageFilePath) {
    var p = require(packageFilePath);
...
Aren't going to work.

First step is find package.json in your root tree of your app package dir, and open it in a text editor. Duplicate your "main" line as a "bin" line:
  "main": "discord_bot.js",
  "bin": "discord_bot.js"
This is a sample config:

{
  "name": "DiscordBot",
  "version": "0.1.2",
  "description": "Bot for Discord app modded by genBTC",
  "readme": "README.md",
  "maintainers": [],
  "author": "",
  "repository": {
    "type": "git",
    "url": "git+https://github.com/genBTC/DiscordBot.git"
  },
  "license": "GPL-2.0",
  "dependencies": {
    "8ball": "^1.0.6",
    ...
    "youtube-node": "1.2.x"
  },
  "pkg": {
     "scripts" : ["src/client/websocket/packets/handlers/*.js",
...
        "src/client/websocket/packets/handlers/Ready.js",
...
        "src/client/actions/*.js",
        "src/client/actions/ActionsManager.js"
        ]
    }
}
JSON tip: Note the comma seperated [ list ] of files in "quotes", and with FORWARD / slashes as the path seperator. You can also use * wildcards.

Before we know what files we need to add, we need to compile the program (as shown before with --debug). You can also pipe the output using > result.txt to save it as a text file and look at it later.

C:\Software>DiscordBot.exe
Starting DiscordBot
Node version: v9.0.0
Discord.js version: 10.0.1
pkg/prelude/bootstrap.js:1172
      throw error;
      ^

Error: Cannot find module './handlers/Ready'
1) If you want to compile the package/file into executable, please pay attention to compilation warnings and specify a literal in 'require' call. 2) If you don't want to compile the package/file into executable and want to 'require' it from filesystem (likely plugin), specify an absolute path in 'require' call using process.cwd() or process.execPath.
    at Function.Module._resolveFilename (module.js:540:15)
    at Function.Module._resolveFilename (pkg/prelude/bootstrap.js:1269:46)
    at Function.Module._load (module.js:470:25)
    at Module.require (module.js:583:17)
    at Module.require (pkg/prelude/bootstrap.js:1153:31)
    at require (internal/module.js:11:18)
    at WebSocketPacketManager.register (C:\snapshot\discordbot\node_modules\discord.js\src\client\websocket\packets\WebSocketPacketManager.js:54:21)
    at new WebSocketPacketManager (C:\snapshot\discordbot\node_modules\discord.js\src\client\websocket\packets\WebSocketPacketManager.js:18:10)
    at new WebSocketManager (C:\snapshot\discordbot\node_modules\discord.js\src\client\websocket\WebSocketManager.js:24:26)
    at new Client (C:\snapshot\discordbot\node_modules\discord.js\src\client\Client.js:63:15)
This tells us that it couldnt find "handlers/Ready", and the faulty node_module is "discord.js".
Also, we can open the files indicated in blue and examine the .js scripts for what kind of stuff is being dynamically included, usually we can find a list of stuff such as:

So, we dig around in that dir, and find handlers/Ready (and all the other ones).
If you want to be precise you can:
Open up another command prompt to generate a listing of these files by :
dir /b *.js > list.txt
Then you can use NotePad++ to manipulate the text (add the rest of the path and " ", and form them into the list of files that needs to be passed to package.json.) Hopefully you are fast at this, because there is going to be a lot of files.
Otherwise you can suffice to say you found out that you want to add the entire
   "pkg": {
     "scripts" : ["src/client/websocket/packets/handlers/*.js",
        "src/client/actions/*.js"
        ]
    }

Process Explained:

You are going to repeat the process of Compiling, Looking at the compiler's debug output, Running the .exe and Looking at the binary's output. Then from that - analyze which files need to be included. You want to predict ahead of time and grab entire directories at once.

You can compare the results files, of the before and after - they should indicate success in adding.
C:\Software>DiscordBot.exe
Starting DiscordBot
Node version: v9.0.0
Discord.js version: 10.0.1
logging in with token
(node:49936) [DEP0013] DeprecationWarning: Calling an asynchronous function without callback is deprecated.
Using gateway wss://gateway.discord.gg/?encoding=json&v=6
Connecting to gateway wss://gateway.discord.gg/?encoding=json&v=6
Connection to gateway opened
Identifying as new session
Logged in! Serving in 2 servers
pkg/prelude/bootstrap.js:1172
      throw error;
      ^

Error: ENOENT: no such file or directory, scandir 'C:\Software\resources\default_app\plugins'
1) If you want to compile the package/file into executable, please pay attention to compilation warnings and specify a literal in 'require' call. 2) If you don't want to compile the package/file into executable and want to 'require' it from filesystem (likely plugin), specify an absolute path in 'require' call using process.cwd() or process.execPath.
    at Object.fs.readdirSync (fs.js:924:18)
    at Object.fs.readdirSync (pkg/prelude/bootstrap.js:776:35)
    at getDirectories (C:\snapshot\discordbot\plugins.js:5:15)
....
We've gotten further. This tells us we've logged in now, but it can't find the plugins directory. This is a directory right under our main app dir, and includes
some JSON and non-JSON files. resources\default_app is the internal name of the .exe's file-structure. So we need to include "plugins" into the exe. For this we can use Assets:

"assets" : ["plugins/*"]


If when you try to run the app, you get NPM trying to download and install stuff, its because it wasnt listed in your package.json dependencies. Just go in and manually add it.

After all this, it works!


Thanks for reading. GenBTC here, signing out. Happy Computing. This has been a 2017 genBTC Production.

Sunday, October 15, 2017

C++ Code Log - activities that I've been learning or doing the past month #1

Things learned:
Zenwinx/Udefrag needs only ntdll.lib no semicolon after. W/ NODEFAULTLIB on.
STUXNET = winapi getprocaddress loadmodule dll on NTDLL kernel WINAPI32 functions.
Depends.exe dependency walker
lib.exe /list:DLL/LIB | findstr strtofind
Assembly: WebAssembly + Emscripten
Use godbolt.org for Compiler Explorer to analyse assembly code.
CPP React
CopperStone w/e
libfat/reactos

Things from the past:
LIB+DLL = Linked Libraries, Shared (DLLs)
LIB+EXP = Static Libraries.
Static Vs Shared. MT vs MD  vs Debug ( MTd vs MDd)
WXWidgets 3.1 Compilation in 8 configs = 32/64 * Debug/Release * Shared/Static
make sure you create the directories right. Its advised to open up the vc($PlatformToolsetVersion)</wxCompilerPrefix> which was actually mentioned in the readme.
WinDDK/WinSDK/NTNDK
MSVC 2010 + SDK 7
2013 = C+11
2015 = C+14
2017 = C+17 
uCRT/uCRTD/MSVCRT/vcruntime.lib

VC Project Files. 
SLN basically does nothing 
VCXPROJ does it all. Edit it carefully, its like XML but less tolerant. 
Things have to go in the right order.
There is also an inheritance system. That is the parent and you can import other .props files in that, based on the order they will inherit in various rates.
The MSVC dropdowns are finicky and you need to realize theres inheritance there, and clearing is not the same as defaulting.
Also theres multiple configurations, and sometimes brings up the wrong config page.
You can set up additonal property pages with the "Property Manager" window. 

There is a utility called SLN2CMake and now VS2017 supports CMake. That way you can convert over.

Intricacies:
/d2noftol3 on CL.exe Compiler switch to disable remade SSE2 functions. Otherwise Linker issue without the ucrt.
https://stackoverflow.com/questions/19556103/how-to-get-vs2013-to-stop-generating-calls-to-dtol3-dtoui3-and-other-funct/31691179#31691179
Its a SSE primitive of Cvtds2dsi?
Windows uses 16-bit(2 byte) chars. Linux is 32-bit. use w_char or wchar_t

C++ Frameworks
Boost165 (Boost Optional. Boost Threading)
Intel Threading Building Blocks https://www.threadingbuildingblocks.org/
QT
CopperSpice
WX
Nana is a library for cross-platform GUI programming in modern C++ style (on Windows/Linux)
LANGUAGE C++11/14
COMPILER Any Standard C++ compiler(Visual C++ 2013, GCC/MinGW and Clang)


Github Projects Cloned or Starred


C++ Videos watched:

CppCon 2016: Dan Gohman “C++ on the Web: Let's have some serious fun." (WebAssembly)
https://www.youtube.com/watch?v=jXMtQ2fTl4c
Unicode Strings: Why the Implementation Matters
https://www.youtube.com/watch?v=ysh2B6ZgNXk
CopperSpice - C++ GUI Framework
https://www.youtube.com/watch?v=LIiwBNvTllk

Friday, July 21, 2017

Compiling FSV - the Jurassic Park program - on Windows 10 with MSYS2

Download the Source Code From https://github.com/genbtc/fsv/archive/master.zip
Github Repository @ https://github.com/genbtc/fsv
If this is what you are going after: http://fsv.sourceforge.net/screenshots/
You came to the right place.

Compiling FSV (File System Visualizer) for Windows takes a bit of effort. This is the tutorial. You need to set up the "MSYS2" development environment, which you can consider similar to Cygwin, if you dont know, it basically sets up a linux environment, and entire filesystem, with windows compatible .exe's compiled of everything, on your Windows machine under a subdirectory like C:\Software\MSYS32

INSTRUCTIONS:
STEP 1 - MSYS

On my machine, I dont like making too many root folders, so I make a C:\Software or C:\Code or whatever name, to put all my dev environment stuff in. Dont make the name too long and MAKE SURE IT DOESNT HAVE SPACES.

Download this version of MSYS2: msys2-i686-20161025.exe (its the latest 32 bit version)
It is available from sourceforge. https://sourceforge.net/projects/msys2/files/Base/i686/msys2-i686-20161025.exe/download

Install it, Pointing the installer to your C:\Software\MSYS32 directory.

We want the "launch after install" button when its done. (otherwise launch it from "C:\Software\msys32\mingw32.exe")
Note: the terminology MSYS, MSYS2, MSYS32 are all the same thing.
Note: However, now we want mingw32.exe (gray icon) don't confuse it with msys2.exe (purple icon)
You should now have this running:

Note: The following commands start with $ to indicate its a command at a command prompt. Dont retype it...

$ pacman -Syu

Hit enter to install the updates. After its done, it asks you to terminate it but you have to click the X until End Process shows and force end it. Also make sure pacman.exe is not running in task manager. Close it if it is.
Note: This requires internet access. If you are using Windows Firewall, you are going to want to disable it during the process because theres just too many .exe's that needs access to manually allow all of them. Dont get stuck on this step trying to do that...

Once again, open back up the MINGW32 shell ("C:\Software\msys32\mingw32.exe") and run the same command again:

$ pacman -Syu

Continue Installing Stuff, these are development packages:

$ pacman -S base-devel unzip mingw-w64-i686-toolchain mingw-w64-i686-gtk2 mingw-w64-i686-freeglut mingw-w64-i686-gtkglext

It will ask you some things, use the default, just press enter each time. Then it will take a while.
base-devel = provides autoconf/automake/pkg-config/tons of stuff.
toolchain = provides GCC,G++ stuff to compile.
GTK2 = a pre-requisite for the user interface (window dressings, menus etc).
Freeglut = an open source version of GLUT which is an API to OpenGL.
GTKGLext = the OpenGL extensions for GTK which we also need.

INSTRUCTIONS:
STEP 2 - Source Code

Download the Source Code From https://github.com/genbtc/fsv/archive/master.zip
(It has to be my repository, because that is where the changes for the Win32 port are)
Extract the FSV source code .zip file from github to your Home dir @ C:\Software\msys32\home\...\ so it lives in C:\Software\msys32\home\...\fsv-master\ (where ... is your username) and has the src/ subdirectory underneath.
Note: the screenshots show fsv-orig (but yours can be fsv-master or fsv)

STEP 2a - Compiling the source code of a gtkglarea-release (pre-req)
Execute the following:
Extract the source of gtkglarea-release-2-0-0.zip to gtkglarea-release-2-0-0 by typing:

$ cd fsv
$ unzip gtkglarea-release-2-0-0.zip

This package provides the required source and the library, and is not available through pacman, so I have provided it in original unmodified form.

Execute the following:

$ cd gtk[TAB](to tab complete)[ENTER]
$ ./autogen.sh

It will run, auto-generate, and auto-execute the configure script for you.
You should see this now:


$ make

You will see a whole ton of stuff scrolling past, this is the actual compiler GCC being run on all the source files. It shows some errors about libtool, but no problem.


$ make install

This will copy the files outputted from "make": libgtkgl-2.0-1.dll and libgtkgl-2.0.a (the linux version of a .dll) to a linux system-wide directory (I could have just provided this file but you wanted to compile stuff)


$ cd ../
$ ./autogen.sh

autogen.sh is the program that checks the autoconf file (configure.ac) and automake file (Makefile.am) input files and parses them into a ./configure script and ./Makefile script
You should see this now:


Execute the configure script.

$ ./configure


If this produces some kind of error, instead of ending happily, refer to Troubleshooting Error #1 below.


$ make


It will compile a ton of stuff, and then end unceremoniously.
But its done now! Now you can install the program by typing:

$ cp fsv.exe /mingw32/bin/

And run the program by typing:
$ fsv


Note: Errors? Read Troubleshooting Below.

Troubleshooting:
ERROR 1:

You did not compile or install the gtkglarea-release-2-0-0.zip properly. Re-read the instructions.
As a last resort, you can override that check by removing the word gtkgl-2.0 from "C:\Software\fsv\configure.ac" (find and delete only that word) and rerunning ./autogen.sh and rerunning ./configure. HOWEVER since you need this package to continue, I doubt that will help.

ERROR2:

                                      OR
ERROR3:

If it says the libgtkgl-2.0-1.dll is missing or you receive the message: " The procedure entry point g_malloc_n could not be located in the dynamic link library C:\..\libgtkgl-2.0-1.dll "
Make sure you place your fsv.exe INSIDE the MSYS binary dll directory (ex: C:\Software\msys32\mingw32\bin\ )
Then you can just make a shortcut to it, and run that.
Alternatively, you can add this C:\Software\msys32\mingw32\bin\ directory to your system environment PATH variable, in System settings as shown:

Alternate to this, you can also create a launcher .bat file. such as "LaunchFSV.bat",  file as a launcher. This sets the required Windows' System Environment "PATH" variable. When you are inside MSYS, it sets the PATH for you, so you can launch it from there no problem by typing ./fsv or ./fsv.exe , But when you try to launch it from Windows, you get libgtkgl-2.0-1.dll errors because it cannot find the all the .dlls we installed through MSYS (in addition to that specific one).
LaunchFSV.bat
PATH=%PATH%;C:/Software/msys32/mingw32/bin;./;
start fsv.exe


ERROR 4:
Disregard this error. It has no impact on the final outcome, and can safely be ignored.

ERROR 5:
You downloaded the source from the wrong repository. You need the genBTC repository (mine), because that is where the win32 fork changes are located. https://github.com/genbtc/fsv and https://github.com/genbtc/fsv/archive/master.zip
OTHER ERRORS NOT LISTED:
Report any bugs on the github repo. Everything will be handled through Github.

Using FSV:
It takes a CONSIDERABLE amount of time for the program to traverse the entire directory structure, (at anywhere from 300-6000 per second) and it does not display much until it does. For your first run, you should point it to a folder with a small amount of files and subdirectories.  FSV.exe takes path arguments, and the bat file does too, so you can put the .BAT file in your Windows SendTo folder, and then right click any directory and Send To LaunchFSV.bat, and it will launch starting in that dir.


Theres a bug in the "Change Root" command, 
You have to delete everything in the bottom text box, THEN click OK, for it to work. It will open to what it says in: "Selection". If you fail to do this, it will just rescan whatever dir you're in, and that sucks. I will work on fixing this soon.

SCREENSHOTS:

This is how it looks in Tree View:
This is how it looks in Map View:
This is how it looks in Disc View (very experimental):


Enjoy. I have not done anything significant enough to claim a copyright on this project, please refer to the original owner's repository and license documentation @ https://github.com/mcuelenaere/fsv